x10ping
(ver 1.514)
|
|
Supported X10 hardware:
Currently the following
X10 hardware is supported: CM11A/C12U, JDS
Startgate/TimeCommander/TimeCommnader-Plus and also any device supported by
ActiveHome Interface (CM15, CM19A, VT37A, etc). However, you will need to have
ActiveHome installed if you plan to use any of the cm15-etc enumerated above.
What is x10ping and why use it?
Have you ever had a
network device such as a router, DSL modem, pc, etc. which will hang every now
and then? The nonly way to get it up and running is to powercycle it? To make
it worst it happens when you are away?
x10ping is your answer.
Note: With this application you will also need an X10
controller such as CM11A(US)/CM12U(Europe) and x10 appliances as needed.
X10Ping is an
application written to monitor network devices by pinging them and when found
down over a defined period of time powercycle them. It's a light application
with a GUI interface, notification, scheduling and logging capabilities.
Get started:
Download the
binary installation package from here
and install it. Currently supported platforms are Windows 98, 2000 and XP. It
could work on other windows distributions however I didn't test on it. Also the
source code is written platform independent (with wxWidgets) and could probably be compiled
on other platforms such as Linux and MacOS.
After you completed the installation, start the x10ping application.
Configuration:
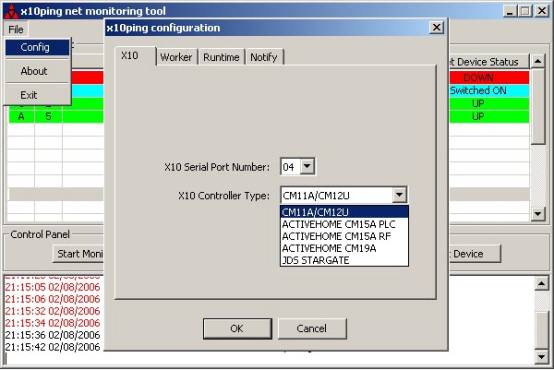
1.
First, set on which serial port is your X10 controller
installed. To do this go to File->Config and there in the first
tab(X10) you will find a select option labelled "X10 Serial Port
Number:". There chose your serial port number. IF your x10 controller doesn’t
have a serial port (like cm1a) you don’t need to select any specific port –
just leave it as it is. Next step is to select your controller type. Then, once
you press "OK" in config windows you should see a message in the logs
saying that the port/interface was successfully open. Else, check your
serial/usb port configuration.
Then, if you whish you can tweak the global setting for the “worker” thread (main loop which does the device pinging). For more details about this setting see step 3 bellow.

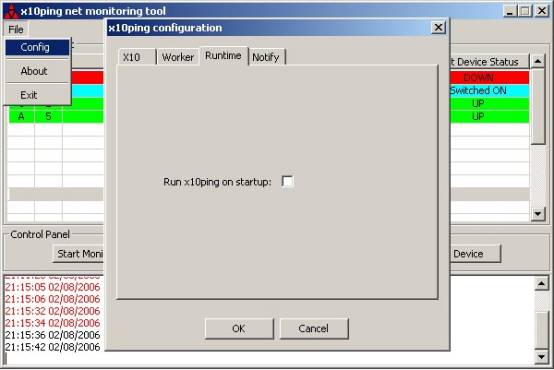
If, you wish that x10ping will start on widows startup then you need to check this option on. Please, note that the application wont start as a service.
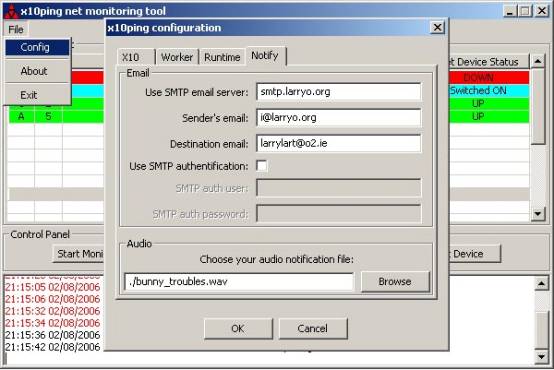
Here, you configure your notification means. Set your outgoing mail server and your source/destination email addresses. For audio notification there is a default wav file in the x10ping package. However you can pick yours.
2. Plug your device to be monitored: router, pc, whatever can be pinged through an X10 appliance module or similar.
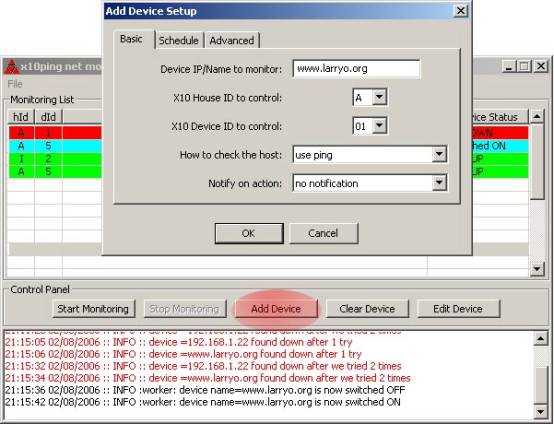
3.
Press "ADD Device" button. Fill in
first, the IP address or host name for your device. Then next select the X10
house id and device id of your appliance and press "OK". For the moment there is only one method
implement to check the host, ping. Then select what kind of notification you
want: no notification, visual, audio or by email.
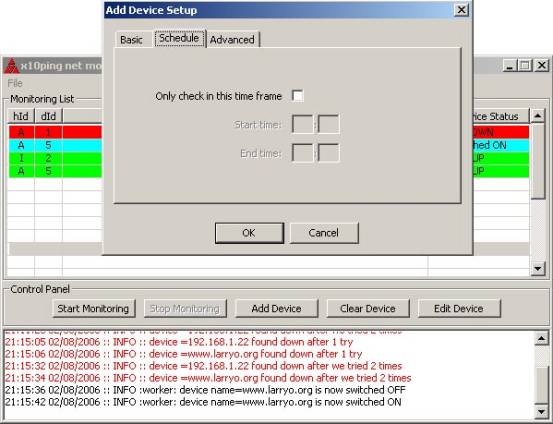
In the next tab “Schedule” you can specify if you want to perform monitoring only into a specific time.
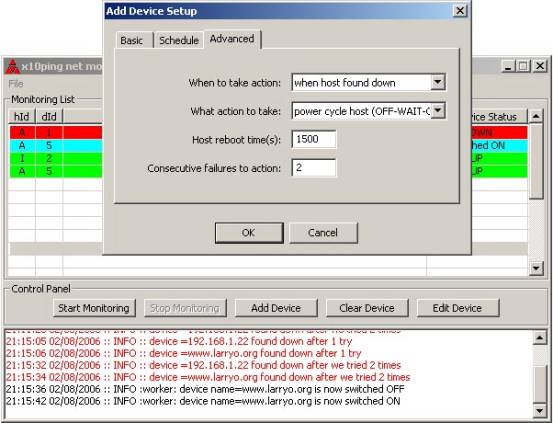
In the “Advanced” tab the following options are available:
- “When
to take action” - will tell x10ping when is the power cycling action (or
other actions as selected bellow) to be taken. For example you can choose
to power cycle a host if it’s found down, up or just slow.
- “What
action to take” – there are four possible actions, power cycle (turn first
OFF the ON), turn ON, turn OFF or do nothing.
- “Host
reboot time” – is useful to tell x10ping to wait for the host which was
just power cycled to boot back in the operating system.
- “Consecutive
failures to action” – specifies how many consecutive time x10ping has to
find the host down in order to decide to take action (ie power cycle).
Repeat this step (and previous) if
you have multiple devices. You can also add multiple host set to powercycle by
the same x10 appliance.
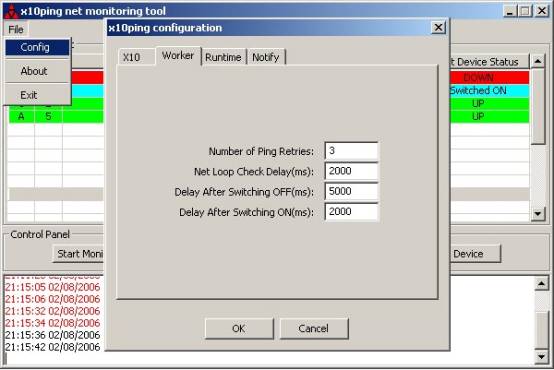
4.
You might want to adjust the "loop" parameters.
This can be done from menu File->Config and there go under
"Worker" tab. The parameters and their relevance are as follow:
- "Number
of Ping Retries" represents how many time should a ping fail
before we power cycle the device.
- "Net
Loop Check Delay (ms)" is the delay added after checking once all
devices in the list. This is represented in milliseconds.
- "Delay
After Switching OFF (ms)" is the delay added after the devices
are switched off (the count to ten/five cooling down period).
- "Delay
After Switching ON (ms)" is the delay added after we switch back
on the device. This has to be
calculated such to allow the device to boot back on and be responsive to ping before we go
on with the monitoring loop. This
delay and the previous will only apply to the normal monitoring
loop and it wont be added to the
power on/off option from the right click menu.
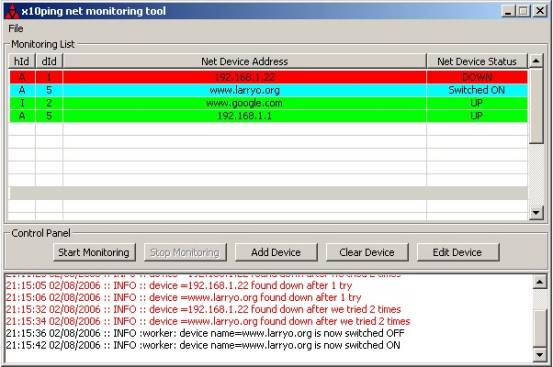
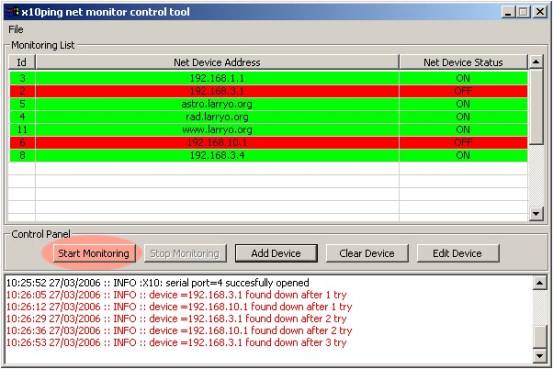
5.
After you completed the configuration press the start
monitoring button and you are set. Failures to ping advice together will a
count down with show up in red in logs. Also the status is shown in list
colours and text (red=down, green=up, cyan=powercycle).
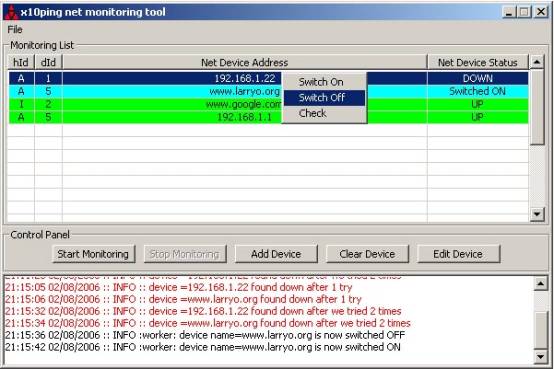
6.
You can also control your device without starting the loop.
To do this select the device you want from the list, right click on it and then
select what action to be taken from the popup menu.
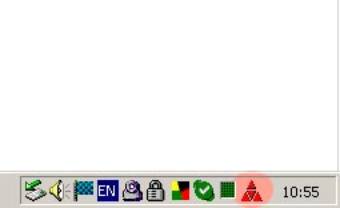
7.
You can now minimize the application and this will hide the window
and add an icon on the task bar. To restore the window do double left click on
the icon.
Other
functionalities helpful in setup are the two buttons "Clear Device"
and "Edit Device". The first will remove one or more
selected devices from the list. The second will let you edit the parameters of
one selected device.
Alternatively you
can edit by hand the config file found under the application install folder,
ex. "c:\Program Files\x10ping\". There are two files:
-
"x10ping.cfg" with the options you
found under File->Config. See example:
[X10]
SerialPort=4
X10ControllerModel=1
[Network]
LoopCheckDelay=2000
DevicePingRetry=3
X10DelayAfterOFF=5000
X10DelayAfterON=2000
[Runtime]
RunOnStartup=0
MonitorOnStartup=0
[Notify]
EmailServer=smtp.larryo.org
EmailFrom=i@larryo.org
EmailTo=larrylart@o2.ie
EmailAuth=0
EmailAuthUser=larry
EmailAuthPasswd=la2
AudioFile=./bunny_troubles.wav
-
"x10ping_dev.cfg" stores your list
of devices. See below an example:
[192.168.1.22]
X10HouseId=1
X10DeviceId=1
LastKnownNetDeviceState=0
DeviceCheckMethod=1
FailuresToAction=2
ActionLogic=1
ActionFunction=4
ActionNotify=3
RebootTime=1005
CheckTimeFrame=1
CheckStartTime=12:00
CheckEndTime=20:00
[www.larryo.org]
X10HouseId=1
X10DeviceId=5
LastKnownNetDeviceState=4
DeviceCheckMethod=1
FailuresToAction=2
ActionLogic=1
ActionFunction=1
ActionNotify=4
RebootTime=1500
CheckTimeFrame=0
CheckStartTime=-01:-01
CheckEndTime=-01:-01
Known bugs:
There are no known
bugs at the moment. However, if you find any please send them to me at i@larryo.org. Any suggestions on how to improve
this application are also welcome.
Main -> Work -> Information